Thursday, March 27, 2014

Spring Look Book 2014

Hi everyone! Today is the first day of my Spring Break, so I thought I would show you guys 4 different outfits that hopefully, you can get inspiration from and make some new outfits for yourself! This week is a bonus week because I will be doing my Spring Break series with a new post each day of this week! Today is day one of my Spring Break series, so I'm gonna need lots of DIY Spring ideas to put up each day! Please send all of your suggestions to the new Pink and Green Place email! I love Spring, and I can't wait to show you the outfits I've put together, so let's get started!

Outfit #1


Outfit #2


Outfit #3


Outfit #4

Monday, March 17, 2014

Get Ready With Me

Hey everyone! Today I am doing a get ready with me post! I am going to show you how I get ready every morning for school! I hope you guys enjoy! Make sure you leave comments below on what your favorite beauty/hair product is! Here we go...

Time: 7:00 AM
Time to wake up sleepy head!

Yes, I know, I look very attractive.

Time to make my bead!


That's better!

Well, to the bathroom I go!

Time to brush those pearly whites!

Shower time!


I will be using Suave Professionals Almond Shea Butter Shampoo and Conditioner,

This pore cleanser from my local grocery store, and...

This bath and body works shower gel in Cranberry Twinkle.

And of course, I have to listen to some music in the shower! Yes, I do sing in the shower.....
Don't judge!!!

And sometimes I get distracted and I get on Instagram, but anyways...

Now it's time to moisturize! I'm using this Jergens, Ultra Healing lotion.

Deodiorant time! 

I also put Infusium 23 in my hair each day. It's almost like a detangler! It repairs your hair! 

Now for my favorite part!! Makeup!!!

First, I am using this Studio Fix powder from Mac. This is shade N4.

Next, I am going to apply this Sephora blush to the apples if my cheeks. This is in the shade of Rose Petal. I am also using this Covergirl (Easy, Breezy, Beautiful, Covergirl) sorry I couldn't help myself.:) blush brush to apply the blush to my face.

For the lips, I am just applying this Nyx lipgloss in the shade of Nude Peach #162.


It has a bow on top!


 Finally, I am applying the Great Lash mascara from Maybelline New York.

Outfit time! (I always lay out my clothes the night before!) The sea foam green shade shirt is from Downeast, The crop top is from Target, the jeans are from American Eagle Outfitters, and the necklace is from JC Pennys. 

To add more dimension to my outfit, I also added this gray short sleeved cardigan from Target.

Now for the hair!!

I am going to be putting my hair in a perfect easy bun, but since I don't want my hair to be sopping wet, I am quickly blow drying my hair.

To start off my bun, I just put my hair into a ponytail in the middle of the back of my head. (You can put your ponytail wherever you would like it.)

Next, I am taking my hair donut and putting it into my hair. (If you would like a more in depth tutorial on how to make this bun, then you can just leave a comment below or send me an email with your requests;)

If you would like a softer look, then you can keep some of your bangs out and just keep them the way they are, or you can do what I'm doing and spray your fly-aways with some hair spray.


And there is the finished hair bun!

Now as you can see, I have no earings on!!!!...

I'm just using my boring, regular look and putting in my favorite pearl earrings. ( this is Taylor Swift's fave accessorie;)

Time to smell good! I'm using this sweet smelling perfume called Hailey from Aeropostale.

I also like to put on any sweet smelling hand sanitizer I can find. ( it doesn't take me long to find one, I have millions of them! Yes I'm a little obsessed!) 

And that's it! Now I'm all ready for the big day ahead of me! 

I hope you guys enjoyed this post! Please make sure to check back weekly for new DIYs, tutorials, and fashion advice! Also, make sure you share my blog with anybody who you think would like it! You can follow me on Instagram and Pinterest! Thanks guys and make sure you leave comments below on anything you would like to see me post in the future! I will let you know what day of the week I am going to start posting. I have a lot of fun stuff planned ;) 
Ok everyone! See you next week and stay Pink and Green!
XOXO, 
Rylee<3

Wednesday, January 29, 2014

Decorating for Valentines Day!


Hey Guys! So today I wanted to show you a roomspiration DIY: Valentines Day Edition! Here are a few things I made to show of my XO spirit!


XOXO,
Rylee


Monday, January 27, 2014

#bowsbeforebros


Hey guys! How are you? My name is Rylee. Who are you? Yes I know I have not blogged in ages, but now I am finally starting up again! This is my first DIY post! Today, I will be showing you how to make these amazingly adorable bows that take less than 5 minutes to make! These are so easy and super cute! This DIY was inspired by my favorite YouTuber, Bethany Mota! She has a video on DIY bows and many more so check out her YouTube channel @macbarbie07! Thanks Beth for the awesome tips! Now, let's get on with the DIY!

First, you are going to need:
Fabric scraps or fat quarters
Fabric friendly scissors
Fabric Fusion or any other type of fabric glue (you can also use a glue gun if that's what you would prefer)
Hair elastics or clips 
Placemat (I don't have one pictured here, but I did end up using one in the process)

To start off your are going to create your 1st strip.
To do this you will fold the edge of the fabric to one inch down.
You will then fold the fabric one more time at the same length to add thickness to your bow. 
After this, you will make a crease then unfold your strips and glue them down.
After your strip is glued, you will cut off the excess fabric with your scissors. 
HELPFUL TIP: Keep your excess fabric to use for your final strip that you will add to the bow at the end. 
In the next step, you will cut off some of the fabric on your strip so it is the appropriate length. You can do the following steps without glue then change your bow as needed. You can then glue down your fabric in the designated areas.


You will now fold both sides into the middle of your strip. This will show your bow's length and width.

You will now pinch the fabric in the middle to see your bow's actual shape. Adjust as needed.

When you like the form of your bow, you will make a pressed crease and then glue inside the crevices of your two main creases. Pinch down for 1 minute as long as your bow is well shaped, it does not have to be fully glued.

Now, your excess fabric comes in. Cut a .5 of an inch of fabric in the size if a thin strip. Did that sentence even make sense?! Oh well! You guys get me! You will put a line of glue on the small edge of the strip of fabric.

You will then begin to wrap it around the pinched area of your bow. 
When you get to the end if the strip, you will put another line if glue on the other edge.

You have now completed making your super cute bow! Let it dry for an hour before you use it. If you would like to glue a hair elastic to the back or even an alligator clip, you can easily put one on before you let your bow dry.
Simply, glue it like the picture above.
Now you have a super cute bow that you can pin to a bag, put in your hair, or model it as a mustache!


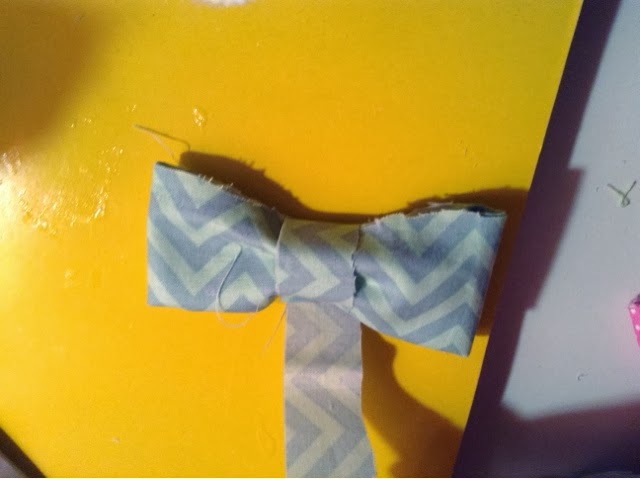
Or a super cool bow tie!

Thanks guys for checking my blog out! If you make your own cute bow, then make sure you send me a picture! Stay pink and Green!
-Rylee