Hey guys! How are you? My name is Rylee. Who are you? Yes I know I have not blogged in ages, but now I am finally starting up again! This is my first DIY post! Today, I will be showing you how to make these amazingly adorable bows that take less than 5 minutes to make! These are so easy and super cute! This DIY was inspired by my favorite YouTuber, Bethany Mota! She has a video on DIY bows and many more so check out her YouTube channel @macbarbie07! Thanks Beth for the awesome tips! Now, let's get on with the DIY!
First, you are going to need:
Fabric scraps or fat quarters
Fabric friendly scissors
Fabric Fusion or any other type of fabric glue (you can also use a glue gun if that's what you would prefer)
Hair elastics or clips
Placemat (I don't have one pictured here, but I did end up using one in the process)
To start off your are going to create your 1st strip.
To do this you will fold the edge of the fabric to one inch down.
You will then fold the fabric one more time at the same length to add thickness to your bow.
After this, you will make a crease then unfold your strips and glue them down.
After your strip is glued, you will cut off the excess fabric with your scissors.
HELPFUL TIP: Keep your excess fabric to use for your final strip that you will add to the bow at the end.
In the next step, you will cut off some of the fabric on your strip so it is the appropriate length. You can do the following steps without glue then change your bow as needed. You can then glue down your fabric in the designated areas.
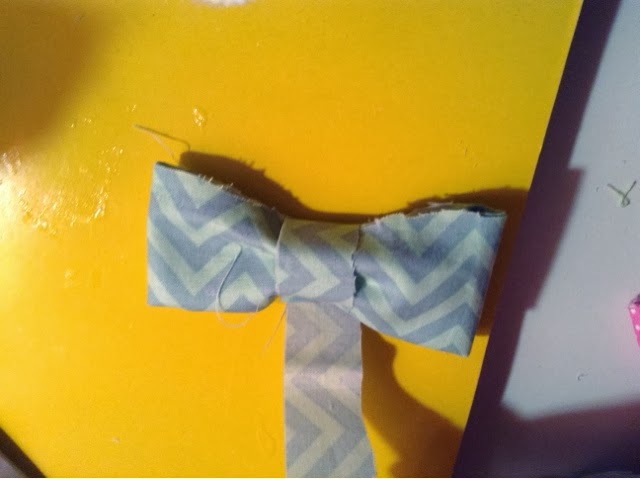
You will now fold both sides into the middle of your strip. This will show your bow's length and width.
You will now pinch the fabric in the middle to see your bow's actual shape. Adjust as needed.
When you like the form of your bow, you will make a pressed crease and then glue inside the crevices of your two main creases. Pinch down for 1 minute as long as your bow is well shaped, it does not have to be fully glued.
Now, your excess fabric comes in. Cut a .5 of an inch of fabric in the size if a thin strip. Did that sentence even make sense?! Oh well! You guys get me! You will put a line of glue on the small edge of the strip of fabric.
You will then begin to wrap it around the pinched area of your bow.
When you get to the end if the strip, you will put another line if glue on the other edge.
You have now completed making your super cute bow! Let it dry for an hour before you use it. If you would like to glue a hair elastic to the back or even an alligator clip, you can easily put one on before you let your bow dry.
Simply, glue it like the picture above.
Now you have a super cute bow that you can pin to a bag, put in your hair, or model it as a mustache!
Thanks guys for checking my blog out! If you make your own cute bow, then make sure you send me a picture! Stay pink and Green!
-Rylee